User guide
How to use Orevive SpineEase: instructions and step-by-step guide
A cordless massager only earns its place on the sofa arm if it is used properly. Here is exactly how to run your first session, where to place it on different parts of your back, neck and legs, and how to build it into a routine that actually helps.
4.8/5from 2,841 UK customers
Written by The Orevive UK care teamLast reviewed August 2026How we write this, and what is not medical advice
The short answer
Charge the unit for around two hours, sit or lie somewhere firm, place it against the sore muscle either side of your spine (not on the bone itself), pick a mode and intensity, then let the 15-minute timer run to completion. Most people settle into a once- or twice-daily routine within the first week.
Buy direct — from £79.95
Genuine Orevive SpineEase, sold direct. Tracked UK delivery and a 30-day money-back guarantee.
£79.95single unit · 2x Orevive SpineEase £143.90
See bundles and orderBefore your first session
Unbox the unit and give it a full charge before you use it for the first time, even if the battery indicator suggests it already has some charge in it. Plug the supplied USB-C cable into any phone charger, laptop or power bank; it takes roughly two hours to reach full charge, which is enough for somewhere between eight and ten 15-minute sessions depending on which mode and intensity you use most. While it charges, read the safety and side effects page so you know who should not use it before you switch it on.
Wear a T-shirt or thin top rather than bare skin for your very first go — it lets you get a feel for the heat and the EMS pulses without either being too intense, and you can always go skin-on for later sessions once you know how your body responds.
Your first session, step by step
Sit on a firm dining chair or lie on a bed or sofa with something solid behind you. The unit needs a bit of pressure from your own body weight to work well, so a soft, sinking sofa cushion is less effective than a firmer surface.
- Press the power button and let the unit finish its brief start-up.
- Position it against the area that is bothering you (see placement notes below).
- Press the mode button to choose heat, kneading, EMS, or a combination.
- Press the intensity button once to start on level one.
- Lean back, relax your shoulders, and let the 15-minute session run its course.
It switches itself off automatically at 15 minutes, so there is no need to watch a clock. If anything feels sharp, sore or uncomfortable rather than a firm, warm pull, stop and lower the intensity next time.
Placement for the lower back
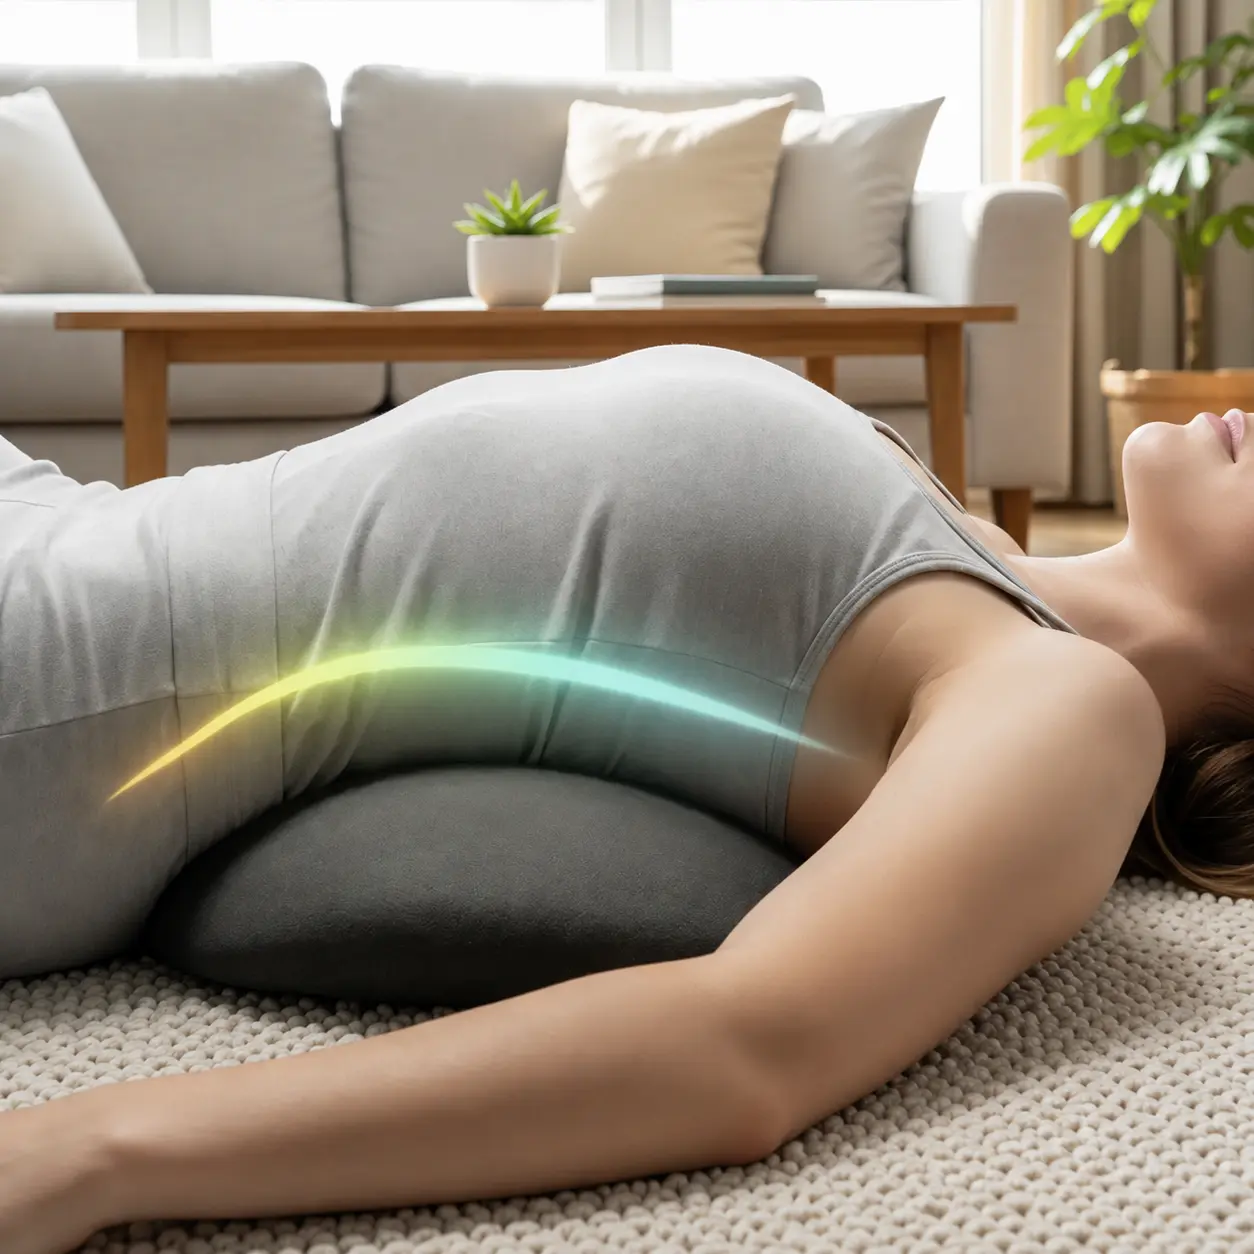
This is where most people use it first. Sit back against the unit so the two kneading nodes sit either side of your spine, roughly level with your belt line or slightly above it — this is the area that tightens up most from sitting, driving or standing for long periods. If you feel it more on one side than the other, that is normal; nudge the unit a centimetre or two towards whichever side feels tighter. For sciatic-type ache running down the leg, keep the unit at the base of the spine rather than sliding it lower onto the hip.
Placement for the upper back and shoulders
Slide the unit up so it sits between your shoulder blades rather than at your waistline. This spot carries a lot of tension for anyone hunched over a laptop or phone all day. Because the muscle here is closer to the surface, many people find they need a lower intensity in this position than they use on the lower back — start on level one and only increase it if the sensation feels comfortably firm rather than sharp.
Neck placement — a word of caution
Orevive SpineEase is designed and sized for the back rather than the neck itself. If you carry tension into your neck and shoulders, it is safer and more effective to work the upper back and the top of the shoulders either side of the neck, rather than placing the unit directly on the neck or throat area. Never position it over the front or sides of the neck, and stop immediately if you feel any dizziness, tingling that spreads unexpectedly, or discomfort.
Using it on the legs and hips
For tightness that radiates into the buttock or the back of the thigh, some people find it helpful to reposition the unit lower, resting it against the top of the hip or the upper hamstring while seated. Use the strap to hold it in place if you want to keep your hands free, and stick to a lower intensity than you might use on the back, since muscle coverage varies a lot from person to person in this area.
Choosing a mode and intensity
- Heat only — gentle and good first thing in the morning when you feel stiff rather than sore.
- Kneading + heat — the everyday combination most people reach for.
- EMS + heat — for deeper, more guarded tension that kneading alone does not shift.
- All three together — the fullest session, often preferred in the evening before bed.
Always start a new mode on intensity level one. The EMS sensation should feel like a light, rhythmic tug or tingle — never a sting or a shock. Increase by one level every few sessions as your body gets used to it, and drop back down a level any time it feels too much. Full detail on every button and setting is on the full instructions below.
Order the official Orevive SpineEase
Tracked UK delivery, 30 days to change your mind, and a manufacturer warranty.
£79.95single unit · 2x Orevive SpineEase £143.90
See bundles and orderBuilding a weekly routine
One or two 15-minute sessions a day is a sensible routine for most adults, with at least four hours between sessions on the same muscle group. Many customers use it once in the morning to loosen up before work or a drive, and once in the evening to unwind. If your back tends to flare after a specific trigger — a long commute, a day of gardening, a heavy gym session — a session straight afterwards, rather than waiting until it is already sore, tends to be more useful.
Give it a genuine run of two to three weeks of consistent use before deciding whether it is working for you. A single session can feel pleasant without necessarily changing much on its own, whereas daily use over several weeks is a fairer test — and is exactly why we offer a 30-day money-back guarantee rather than a shorter window.
Track what works
Keep a rough note of which mode, intensity and placement felt best after each session for the first couple of weeks. Backs vary a lot from person to person, and most people land on a favourite combination fairly quickly once they have tried a few.
Mistakes that blunt the results
- Using it over a thick jumper or coat that blocks the heat — a T-shirt or thin top works best
- Jumping straight to maximum intensity, which tends to make a muscle guard rather than relax
- Placing it directly on the spine or on bone rather than the muscle either side
- Using it once, expecting an instant fix, and then leaving it in a drawer
- Skipping charging until the battery is completely flat, then being caught out mid-session
- Using it immediately before heavy lifting or exercise rather than afterwards, when muscles are more tolerant
Cleaning and looking after it between sessions
Wipe the surface with a slightly damp cloth after use, especially if used on bare skin, and let it dry fully before storing it in the supplied travel bag. Full cleaning, storage and charging detail — plus a troubleshooting table — is covered on the full instructions below.
Orevive SpineEase instructions: the full manual
What's in the box, briefly
Alongside the massager itself you get a USB-C charging cable, a travel bag and a printed UK guide. If you want the full breakdown of materials, dimensions and pack contents, that lives on the specifications page — this page focuses purely on how to operate, clean and maintain the unit.
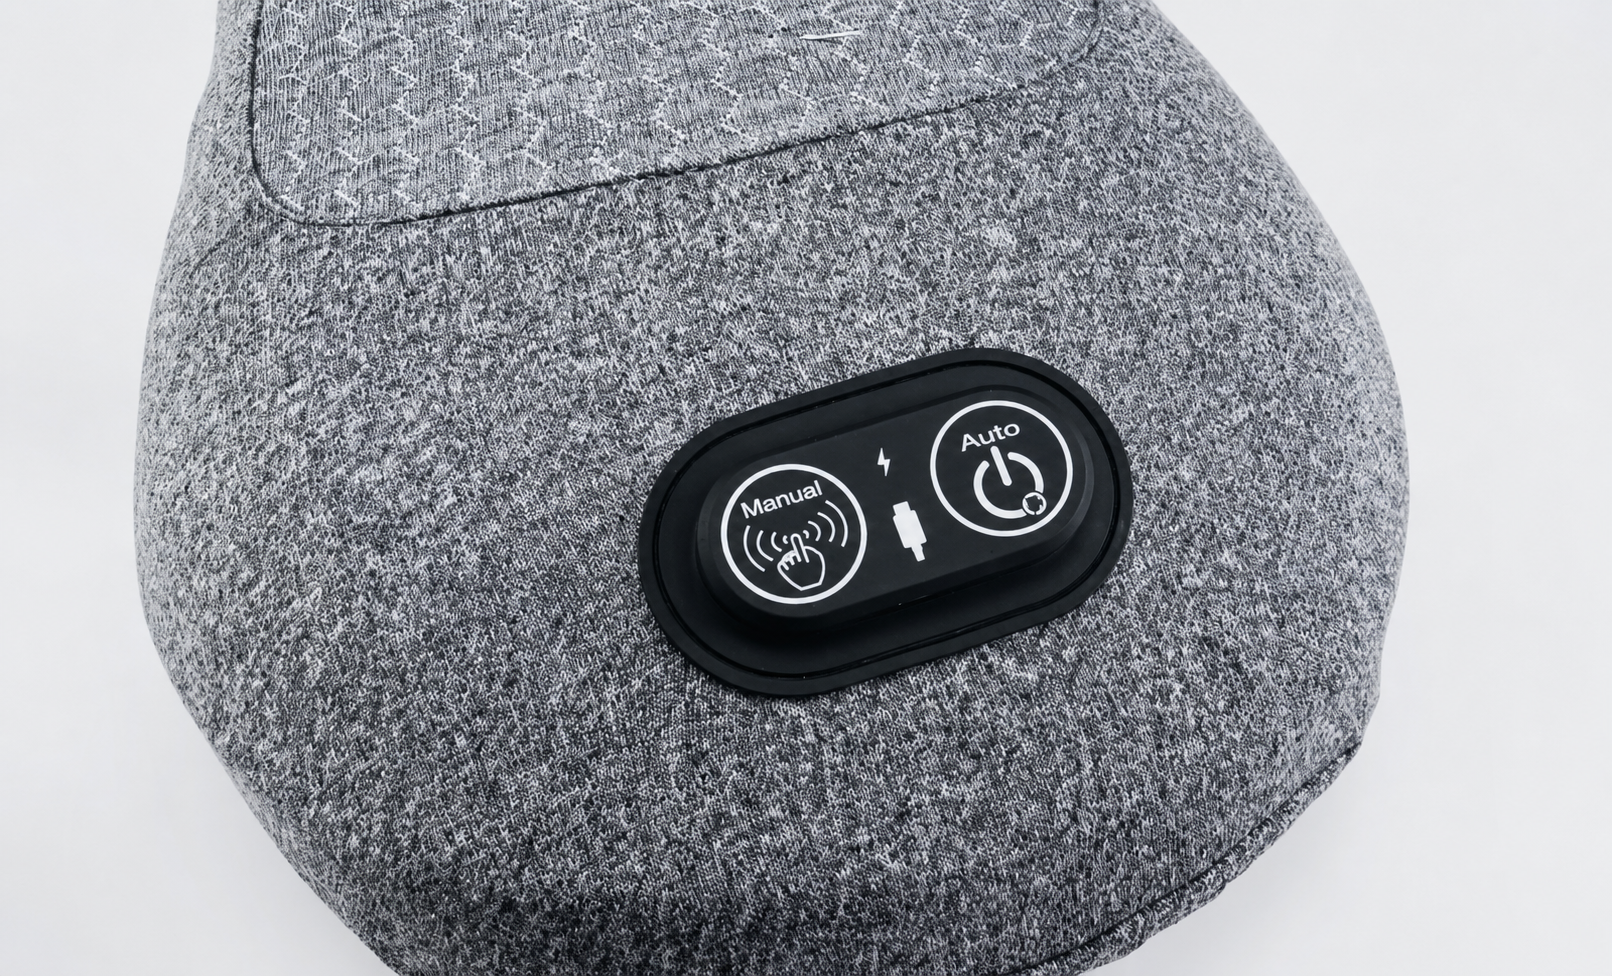
The three buttons, explained
Mode button
Press once to switch the unit on. Successive presses cycle through the available combinations of EMS pulse stimulation and kneading vibration, so you can choose heat alone, kneading alone, EMS alone, or combinations of the three. Hold it down for a couple of seconds to switch the unit off before a session's 15 minutes is up, if you need to stop early.
Intensity button
Controls the strength of the EMS pulses and kneading vibration in steps. Each press moves up one level; the unit remembers your last-used intensity between sessions, so check it before you start rather than assuming it has reset to the lowest setting.
Heat button
Toggles the infrared heating element, which warms to a maximum of around 42°C. Heat can be used on its own or layered with EMS and kneading. It takes a short while to reach full temperature, so give it a minute after pressing the button before deciding whether it feels warm enough.
Understanding intensity levels
Intensity applies to the EMS pulses and the kneading vibration, not the heat, which is a simple on/off toggle. There is no universal "right" level — it depends on your own tolerance, where you are using it, and how used to it you have become.
- Lowest levels — best for first-time use, sensitive areas, or use over a thin top rather than bare skin.
- Middle levels — where most regular users settle for everyday lower back sessions.
- Highest levels — for those used to the sensation and wanting a firmer, deeper feel on well-covered muscle such as the lower back or glutes.
Always start any new mode, or any new area of the body, on the lowest intensity and work up gradually. The sensation should be a firm, rhythmic pull — if it ever feels sharp or painful, lower the intensity or stop.
Charging
Connect the supplied USB-C cable to the port on the unit and to any standard USB power source — a phone charger, laptop or power bank all work. A full charge takes around two hours and typically provides 8-10 sessions, depending on which modes and intensities you use most, since heat and higher EMS intensities draw more power than kneading alone. An indicator light shows charging status; let it finish before your first use even if it appears to have some charge already.
Charging habits that help battery life
As with most rechargeable devices, avoid leaving it on charge for extended periods after it reaches full, and avoid letting the battery run flat for long stretches between uses. Topping it up roughly once a week, in line with typical use, is a sensible habit.
Cleaning
After each session, wipe the surface that contacts skin with a soft cloth lightly dampened with water, particularly if used directly on bare skin or after a warm session. Do not submerge the unit in water, run it under a tap, or use alcohol-based or abrasive cleaners, as these can damage the surface and the electronics inside. Let it air dry fully before placing it back in the travel bag or using it again.
Storage
Store the unit in the supplied travel bag, somewhere dry and at a normal room temperature. Avoid leaving it in a hot car, near a radiator, or anywhere damp such as a bathroom cabinet, as both heat and moisture can affect the battery over time. If you are not going to use it for an extended period, it is sensible to store it with a partial rather than empty charge.
Troubleshooting
| Issue | What to try |
|---|---|
| Unit won't turn on | Charge it fully via USB-C for a full two-hour cycle, then try again. Check the cable is seated firmly at both ends. |
| Session stops before 15 minutes | This usually means the battery is low. Give it a full charge and it should complete a full session normally. |
| Heat doesn't seem to be working | Press the heat button and wait a minute for the element to warm up. Check the mode display shows heat as active, and that the unit isn't over thick clothing that is blocking the warmth. |
| EMS feels very weak or absent | Increase the intensity level, and check the unit is making firm, even contact with skin or a thin top — a gap or loose contact reduces the sensation noticeably. |
| EMS feels uncomfortably strong | Lower the intensity immediately, and consider using it over a thin top rather than bare skin until you are used to it. |
| Battery seems to drain faster than before | This is more noticeable with heavy use of heat and high EMS intensity, which use more power than kneading alone. If it persists well outside the roughly 8-10 session range, contact support. |
| Nothing helps | Email support@orevivespineease.co.uk or call 0800 048 7422 — you're covered by the manufacturer warranty. |
When to contact support rather than troubleshoot further
If the unit shows signs of physical damage, the battery does not appear to hold any charge at all after a full charging cycle, or you notice an unusual smell or sound, stop using it and contact our UK support team rather than continuing to troubleshoot. Every unit is covered by a manufacturer warranty, and our team can talk you through a replacement or repair where needed. For placement, session length and building a routine around the device, see the steps above, and for who should avoid using it altogether, read side effects and safety.
Tracked UK delivery, dispatched from a UK warehouse
30-day money-back guarantee, no restocking fee
manufacturer warranty and UK-based support
Official store — genuine unit, not a marketplace copy
Safety, contraindications and when to see a GP
- Do not use if you have a pacemaker or any implanted electronic device
- Do not use during pregnancy, over broken skin, or on numb areas
- Speak to your GP or physiotherapist first after spinal surgery or a recent injury
- Seek urgent care for numbness around the groin, loss of bladder or bowel control, weakness in both legs, unexplained weight loss or fever with back pain
Questions people ask us about this
How many buttons does Orevive SpineEase have?
Three: a mode button, an intensity button and a heat button. Together these control EMS pulse stimulation, kneading vibration and infrared heat.
How long does a full charge take?
Around two hours over USB-C, giving roughly 8-10 fifteen-minute sessions.
What temperature does the heat reach?
The infrared heating element warms to a maximum of around 42°C.
How long should a session last?
Each session runs for 15 minutes and switches off automatically, so there is no need to time it yourself. Most people find that running the full session, rather than stopping early, gives the best result.
Can I use it on bare skin?
Yes, once you are used to it. For your first couple of sessions, a thin top can make the heat and EMS pulses feel more gradual while you find your preferred intensity.
Should I use it before or after exercise?
Both are fine, but many people prefer it after activity, when muscles are warmed up and more tolerant, rather than immediately before something strenuous.
Can two people share one unit?
Yes — wipe it down between uses and let each person charge and use it on their own schedule. A multi-unit bundle means nobody has to share.
What if the intensity feels too strong even on level one?
Try heat-only mode first, or use it over a thin top rather than bare skin, and build up from there. Everyone's tolerance is different.
Is it normal to feel nothing on the first try?
It can take a session or two to find your ideal placement and intensity. If you still feel little after several sessions on a higher setting, try repositioning it slightly rather than assuming it is not working.
Sources and further reading
We link to NHS and other public guidance so you can check anything on this page for yourself. Orevive SpineEase is a wellness device, not a medical treatment.
Keep reading
Ready to give your back a break?
Order Orevive SpineEase with tracked UK delivery and 30 days to change your mind.
30-day money-back guarantee · Secure Shopify checkout · Tracked UK delivery
Compare all three bundles first